TL;DR
Start with an FDM printer (Creality Ender-3 V3, ~£180) for organisers and inserts. Graduate to resin (Elegoo Mars 4, ~£150) for detailed miniatures. Free files: Thingiverse, MyMiniFactory, Printables. Budget ~£50 for filament or £30 for resin to outfit your first 5 games. Print time: 2-20 hours depending on complexity. Learning curve: manageable in one weekend for basic prints.
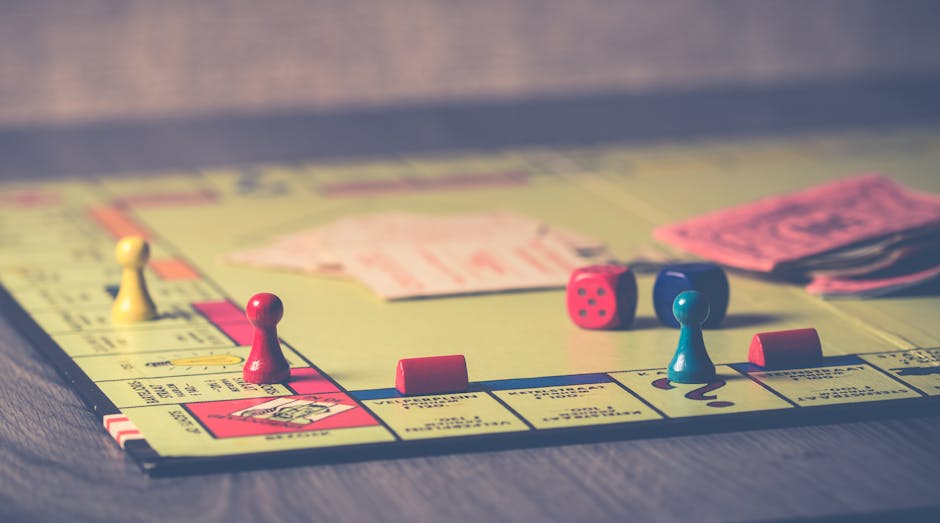
The first component I 3D printed was a replacement money token for Scythe. The original cardboard disc had warped from a spilled drink. What arrived from my printer eight hours later was a satisfying, heavy piece that made every transaction feel like actual commerce.
That was three years ago. Since then, I've printed custom inserts for thirty games, miniature upgrades for half a dozen more, and designed bespoke components that don't exist anywhere else.
This guide covers everything to get started—and go further.
Why 3D Print Game Components?
The reasons vary by gamer:
Replacement Parts
Publishers go out of business. Limited editions become impossible to find. Print-on-demand means never losing a game to missing pieces.
Upgraded Components
Replace cardboard tokens with tactile plastic. Turn generic cubes into thematic pieces. Make premium versions of budget games.
Custom Organisers
Purpose-built inserts speed up setup and teardown. No more baggie rummaging. Every component has its place.
Expansion Storage
When expansions don't fit in the base box, print consolidation solutions.
Accessibility
Taller tokens for players with dexterity issues. Colour-coded pieces for colour blindness. Custom card holders for limited mobility.
3D printing transformed how I store games. What used to take 15 minutes to set up now takes 3. The cost of printing is nothing compared to the time I've saved across hundreds of sessions.
Choosing Your First Printer
Two technologies dominate hobby printing: FDM (filament) and resin. Each suits different applications.
FDM (Fused Deposition Modelling)
How it works: Melts plastic filament, deposits in layers.
Best for:
- Box inserts and organisers
- Token trays and card holders
- Large terrain pieces
- Replacement tokens (medium detail acceptable)
- Resource containers
Not ideal for:
- Detailed miniatures
- Fine text
- Components under 1cm
Recommended first printer: Creality Ender-3 V3 SE (£180). Reliable, well-supported, excellent value.
Resin (MSLA/SLA)
How it works: UV light cures liquid resin layer by layer.
Best for:
- Detailed miniatures
- Fine jewellery-like components
- Small tokens with text/symbols
- Character pieces
- Anything under 3cm requiring detail
Not ideal for:
- Large prints (slow, expensive)
- Functional parts (brittleness)
- Enclosed spaces without ventilation
Recommended first printer: Elegoo Mars 4 (£150). Excellent print quality, beginner-friendly, strong community support.
Which to Choose?
FDM vs Resin Decision Guide
| Priority | Choose FDM | Choose Resin |
|---|---|---|
| Organisers/inserts | ✅ | ❌ |
| Miniatures | ❌ | ✅ |
| Large terrain | ✅ | ❌ |
| Token upgrades | Acceptable | ✅ Preferred |
| Budget-conscious | ✅ Cheaper ongoing | Initial savings |
| Space/safety | ✅ Minimal concerns | Requires ventilation |
| Speed | ✅ Faster | ❌ Slower |
Most dedicated board game printers eventually own both. Start with FDM for the forgiving learning curve, add resin later for miniature detail.
Finding Free Print Files
You don't need to design anything yourself. Thousands of ready-to-print files exist.
Thingiverse
The largest free repository. Search "[Game Name] insert" or "[Game Name] organizer" (American spelling often yields more results).
Strengths: Massive library, completely free Weaknesses: Variable quality, no curation, dated interface
Printables (Prusa)
Curated, higher average quality. Growing board game section. Excellent search and filtering.
Strengths: Quality control, good previews, active community Weaknesses: Smaller library than Thingiverse
MyMiniFactory
Focus on miniatures and detailed pieces. Mix of free and paid designs.
Strengths: Excellent miniature quality, designer support Weaknesses: Best content often paid
BoardGameGeek Files Section
Game-specific files in each game's BGG listing. Community-tested, well-documented.
Strengths: Game-specific community validation Weaknesses: Requires navigating BGG's interface
Patreon Creators
Subscribe to designers for ongoing releases. Typically £3-10/month.
Notable creators: Gloomhaven-focused designers, Loot Studios (miniatures), various insert specialists.
💡 Before Printing
Always check comments on public files. Common issues (scaling problems, fit issues, required modifications) are usually documented by previous printers.
Materials Guide
FDM Filaments
PLA (Polylactic Acid)
- Easiest to print
- Biodegradable (technically)
- Wide colour range
- Low strength, not heat resistant
- Best for: Organisers, inserts, non-stressed parts
- Cost: £15-25/kg (prints ~100 small components)
PETG
- Stronger than PLA
- More flexible
- Slightly harder to print
- Best for: Functional parts, things that need durability
- Cost: £18-28/kg
ASA/ABS
- Industrial strength
- Requires enclosure (fumes)
- Best for: Parts needing heat/UV resistance
- Cost: £20-30/kg
Resins
Standard Resins
- Good detail, moderate brittleness
- Best for: Display pieces, protected miniatures
- Cost: £20-35/litre
ABS-Like Resins
- Improved toughness
- Slightly reduced detail
- Best for: Handled components, game pieces
- Cost: £25-40/litre
Water-Washable Resins
- Easier cleanup (water instead of alcohol)
- Slightly reduced detail
- Best for: Beginners avoiding harsh chemicals
- Cost: £25-40/litre
Your First Print: Step by Step
For FDM (Organiser Insert)
Equipment needed:
- Printer (assembled and calibrated)
- PLA filament (any colour)
- Downloaded STL file
- Slicing software (Cura—free)
Download and Inspect
Get your STL from Thingiverse/Printables. Open in slicer to preview. Check dimensions match your game box.
Configure Settings
In Cura:
- Layer height: 0.2mm (standard quality)
- Infill: 15-20% (adequate for inserts)
- Supports: Usually "no" for inserts
- Print speed: 50mm/s (safe starting point)
Prepare Print Bed
Level your bed (critical for first layer adhesion). Clean with isopropyl alcohol. Apply glue stick if struggling with adhesion.
Start Print
Slice the model, transfer to printer (SD card or direct connection). Heat bed and nozzle per filament specs (PLA: 60°C bed, 200°C nozzle). Watch first layer—if it doesn't stick, stop and re-level.
Post-Processing
Let cool completely (10+ minutes). Remove from bed. Clean any strings with craft knife. Test fit in game box.
For Resin (Token Set)
Equipment needed:
- Resin printer
- Resin (standard or ABS-like)
- Slicer (Chitubox—free)
- Isopropyl alcohol (95%+)
- UV curing lamp or sunlight
- Nitrile gloves (essential)
- Ventilated space
Prepare Workspace
Work in ventilated area. Lay down protective covering. Put on gloves. Never touch uncured resin with bare skin.
Configure Settings
In Chitubox:
- Layer height: 0.05mm (high detail)
- Exposure: Per resin manufacturer specs
- Supports: Auto-generate, then inspect
- Lift speed: 60mm/min (prevent suction issues)
Fill vat with resin. Transfer sliced file to printer. Start print. First layers take longer (base exposure). Check periodically through first hour.
Post-Processing
Remove from build plate. Wash in isopropyl alcohol (2 baths, 3 minutes each). Let dry completely. Cure under UV (6 minutes per side minimum). Remove supports with flush cutters.
⚠️ Warning
Resin is toxic until fully cured. Wear gloves throughout. Dispose of waste properly—uncured resin shouldn't go down drains. Cure waste resin in sunlight before disposal.
Common First Projects
Easy Wins (FDM)
Card holders: 1-2 hours print time, immediately useful Token trays: Sort resources without baggies Player screens: Organise personal area components First player markers: Custom thematic pieces
Moderate Difficulty (FDM)
Full game inserts: 10-20 hours print time, massive quality-of-life improvement Tile organisers: Speed up games like Carcassonne Custom dice towers: Functional and decorative
Advanced Projects (Resin)
Custom miniatures: Replace standees with 3D figures Detailed tokens: Resource pieces with game-specific designs Terrain pieces: 3D scenery for thematic games
Cost Analysis
Is printing cheaper than buying components?
3D Printing vs Commercial Upgrades
| Component | Commercial Cost | Printing Cost | Savings |
|---|---|---|---|
| Scythe metal coins | £45 | £8 (filament) | 82% |
| Wingspan eggs | £25 | £5 (filament) | 80% |
| Gloomhaven insert | £50 | £12 (filament) | 76% |
| Custom miniature set | £40+ | £10 (resin) | 75% |
| Player organisers (4) | £30 | £6 (filament) | 80% |
Break-even point: After printing components for 3-4 games, your printer has paid for itself versus commercial alternatives.
Hidden costs to consider:
- Electricity (minimal—£0.50-1 per large print)
- Failed prints (budget 10-20% waste initially)
- Replacement parts (nozzles, FEP films)
- Time investment (significant but decreasing)
Troubleshooting Common Issues
FDM Problems
First layer not sticking:
- Re-level bed
- Increase bed temperature 5°C
- Apply glue stick or hairspray
- Check for drafts
Stringing between parts:
- Reduce print temperature 5-10°C
- Increase retraction distance
- Enable "combing" in slicer
Layer shifting:
- Tighten belts
- Reduce print speed
- Check for mechanical obstructions
Resin Problems
Print stuck to FEP (not build plate):
- Increase bottom exposure time
- Level build plate again
- Lightly sand build plate
Supports failing mid-print:
- Add more supports
- Increase support thickness
- Angle model to reduce peel forces
Soft or uncured spots:
- Wash more thoroughly
- Cure longer
- Check resin date (old resin degrades)
Designing Your Own Components
When no existing file meets your needs, create your own.
Beginner-Friendly Software
Tinkercad: Browser-based, no installation. Combine basic shapes. Perfect for simple tokens and organisers.
SketchUp Free: Intuitive interface. Good for box inserts with precise dimensions.
Intermediate Software
Fusion 360: Professional-grade, free for hobbyists. Parametric design allows dimension changes without rebuilding.
Design Tips
💡 Design Principles
- Add 0.2-0.5mm clearance for parts that nest
- Round corners (stronger, prints cleaner)
- Avoid overhangs over 45° without supports
- Test small sections before full prints
- Design in millimetres, export in millimetres
Community and Resources
Learning Resources
YouTube channels:
- Makers Muse (general printing)
- Rahdo Runs Through (board game specific)
- 3D Printing Pro (technique deep dives)
Subreddits:
- r/3Dprinting (general help)
- r/PrintedMinis (miniature focus)
- r/boardgames (find what others have printed)
Getting Help
Most problems are solved problems. Google your error message + printer model. Reddit threads and manufacturer forums cover 95% of issues.
Frequently Asked Questions
How long do printed components last?
PLA: Indefinitely with normal handling. Avoid heat (cars in summer) and extended UV exposure.
Resin: Extremely durable once cured. More brittle than PLA but handles fine with care.
Can I sell printed components?
Depends on the file license. Most free files are personal-use only. Commercial use requires designer permission or royalty-free licenses.
How much time does this really take?
Initial learning: One weekend to first successful print. Ongoing: 10-30 minutes per project for setup and post-processing, plus unattended print time.
Is the noise a problem?
FDM: Moderate fan noise, comparable to a quiet PC. Resin: Nearly silent. Both are fine for overnight printing in adjacent rooms.
What about print failures?
Budget 10-20% material waste when learning. Most failures happen in the first hour—check early and you'll rarely lose full prints.
Final Thoughts
3D printing for board games sits at the intersection of two hobbies, each deep enough to consume unlimited time. The rabbit hole goes as deep as you let it.
But it doesn't have to be overwhelming. Start with one organiser for your most-played game. Experience the satisfaction of components designed exactly for their purpose. Then decide if you want more.
My first printed token was a replacement for something damaged. Three years later, I'm designing components for games that don't have commercial options.
Start small. Print something tonight. See what clicks.
The Smoothie Wars Content Team creates educational gaming content. The team owns two printers, a dozen half-finished designs, and opinions about layer height.